Do you ever have a really cute idea and then all of a sudden that idea takes on a life of it's own? Formed a path in your life head that your not really sure you wanted it to take? Happens to me all the time.
I did a three day photoshoot at a candy store a few weeks back (post coming) and they had this adorable easter basket for sale.
I knew when I saw it that I was going to have to make something like it for the girls. Now, I could of just left the thought at that, make one for the girls that is. But, the way my brain has always worked is, think big. So instead of just keeping it small, I always tend to go a bit extreme.
The thoughts began.
"I could make twenty or so of these and sell them for Easter. It's okay that Easter is only a few weeks away. They are so cute! Wow, they came out really cute! Maybe I can make a business out of this. Get an Etsy store online. Make Easter baskets, tutus, hair bows, purses. I'll become the tulle queen! I also need to have a boys line?"
So after a few minutes of thinking down this road. About the part where I'm trying to come up with a great location for my tutu shop, I remind myself how many hours are actually in a day. I remind myself of what I already have on my plate. I also come to the conclusion that I'm not completely in love with this idea of knotting tulle around baskets. All day. I like tulle but not that much.
Yes, they are cute, but I'm good with just two.
So with that said I thought I would share the cuteness with you so you could make one, instead of buying one from "Tutus By Linsey."
To put it bluntly, make your own!!
No sewing, glueing, or anything fancy! Melissa you can do this!!!
Maybe a little patients, but really you don't even need much of that. As long as you stick to just making one or two that is.
What you will need:
Tulle
This was one of those small decisions that had me in the tulle isle for quite sometime. I finally decided on these four colors. You don't need to have four, you could do any sort of combination that you want. One, three, seven colors! I purchased two yards of each color. Later you will find that I ran out, so buy more than I did. I would say six yards total per basket. Give or take depending on the size of basket you have.
A Basket
I used wire baskets to make it easier on myself. This way you can tie the tulle right onto the basket instead of finding a way to attach the skirt later on. You could use any sort of basket though, you would just need to knot the tulle around elastic or ribbon and then attach that around your basket. I went to goodwill and found a plethora of basket options. I was happy to find two cute wire ones. It was half-off day, so it only cost me about $5.00 for both. Score.
 |
| Isn't this basket super cute just the way it is? But, just wait, it gets overwhelmingly cute!! |
Scissors
Some sharp scissors.
Ribbon
This is optional, but enhances the cuteness! So, I would say it's required.
That's it. I'm telling you, it's super simple.
First, fold your tulle in half and cut it into strips. The size you make the strips is totally up to you. I did them about, I don't know what does that look like? 1 1/2 inches? I don't get technical when I get crafty. Sort of like how I cook, just wing it! My mentality with this sort of thing is, it will all work out in the end. But, if you are the kind of person that likes it to be exact, then by all means measure away.
Then go down the line and cut along the folded end,
so you end up with two separate strips.
Do this for all your tulle colors.
Now your ready to start knotting,
after you take a sip of your delicious mocha that your wonderful husband made you with a cinnamon heart on top. Yes, he's the best! I think I'll keep him.
Take two of your strips and fold them in half.
Make a loop.
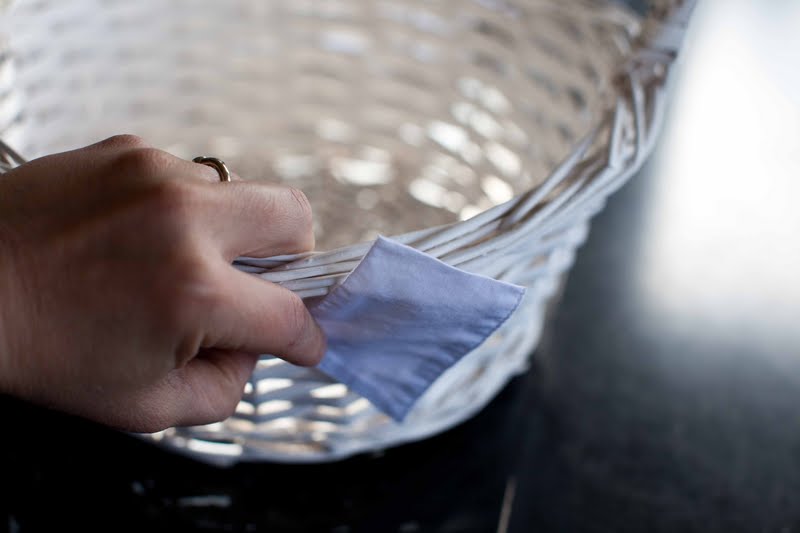
Lay that loop over the top of the basket, thread the other end through the hole in the basket, then bring it up and through the loop you made. Making a knot.
Continue with your pattern.
This is where I ran out of tulle on this basket
But I had finished miss Ella's earlier.
Isn't that the most adorable easter basket you have ever seen? Seriously!
The details
On this one I covered the handle with ribbon,
added bows, and ribbon strands.
I also wrapped ribbon all around the top edge. This isn't necessary and I might not do this with Abby's because the holes on her basket are very small. But, I love how it finishes it off.
You could also cut around the bottom to shorten up the skirt, or cut your strips smaller. I lean towards the, "go big or go home" look. I do know that it looks a little like an adult tutu on a child sized basket, but I love it!
So, just fluff and your done!
Now, I wasn't kidding when I said I needed a boys line. I can't leave the boys out.
I bought these baskets for them. Brand new target baskets for a fraction of the price. Goodwill rocks!
Think bow ties, buttons and possibly suspenders. I know, gaggable levels of cuteness.
Cute enough to sell, but we're not going there!